pink

Tuesday, May 24, 2011

Day 46

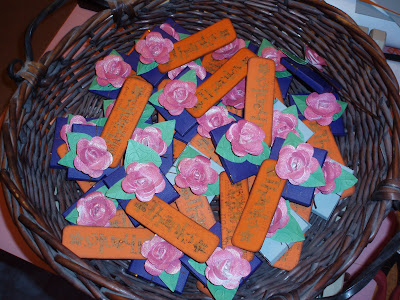
Today I have some party favors I made! These are really cute (and simply) Ghirardelli square chocolate boxes. First, cut out several strips of paper that measure 2.5x6 inches. It's probably easier to cut out the 2.5 inches first from a piece of 12x12 paper, then cut down the middle; but which ever way you prefer as long as you get the same result.

Next, score along the long sides at 1/4 inch, both sides. Turn and score at 1.75, 2, 4.25 and 4.5 inches. The short end is the end that gets folded up toward the front to form the pocket; cut the 1/4 flaps on both sides of the scor, on both sides of the paper, up to the 1/4 scor line that runs the long end of your paper. I sure hope that makes sense!

On the long end, the end that will fold over the front, you want to cut on the scor line that runs along the long end of the paper, both sides, up to the second perpendicular scor line. Again, I hope that makes sense. If not, hopefully the photo above will help. I almost forgot to mention to put 1/8 red tape on the short end; doesn't matter if it's on the inside or outside.


I used some hemp string from the jewelry department at Ms to tie up the packages. The 'thanks' is from the Base Camp Cricut cartridge; I altered that a bit in CDS, removing one of the holes. Then I stamped a piece of cardstock with a stamp. And I stamped the cut out "thanks" with the same stamp and glued to the cardstock. I thought that would look nice having both of them stamped with "thank you" and on the "thanks" cut out. Then I inked the edges with Tim Holtz's walnut stain. It's strung through and held in place with the same hemp string.

I knew I wanted flowers on top; running out of time to make these, thankfully I remembered that I have dozens of paper roses I made last year in a photo box. Pulled them out, spritzed with Glimmer Mist Cherry Limeade (old formula), embossed some green paper with my Cuttlebug, and cut out hearts for the leaves. A 3D glue dot keeps the rose and leaves in place. Oh! and what a great way to get rid of and use paper I don't want anymore! :-)


want to win an eCraft?

Go to the Paper Crafter Corner's website for details. They tell you exactly what you need to do for a chance to win an eCraft! Good luck!

Monday, May 23, 2011

Day 45

This layout is truly sweet! I was going to use it for my fur-babies but now I think I might use it for one of the grand kids.

Day 44

Another cute layout using Echo Park paper! letter pieces are cereal box and paper. Pop dots for effect.

Day 43

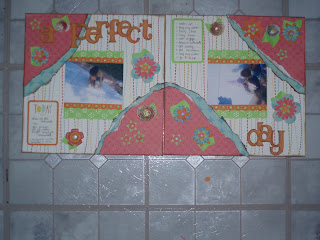
This layout came out really nice. I think I might make some changes to is with the mat. The letters are from a cereal box with paper adhered to it. I think the cart was Cherry Limeade but I could be wrong about that.

After I cut out and adhered everything I dipped each letter in versa mark and embossing powder. The flourish is cut out from a die on paper and dipped in embossing powder (quickly, while still wet from the previous heat) to make my own embellishments. I will try to remember to do a video tut on the technique; it's really simple.

Finally, I used two different MS punches and overlayed them on the mats. I think I'll use my un-du to lift the mats up and combine so they're continuously running between the two layouts. OH! the diamonds is something I created in my CDS; it wasn't easy.


Day 42

I love this layout!

Sunday, May 22, 2011

Day 41

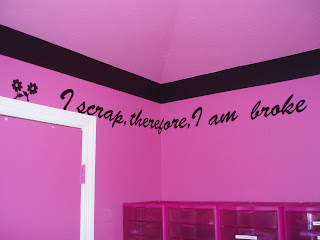
Hi all! Sorry it's been a while! It's been crazy busy! But my schedule should lighten up after this week so I can get back to what I love best! But because I'm having a party at my house this week, and some of my friends will be getting a "tour" of my house, including my custom scraproom,  it's given me a chance to take care of some more decor in my scraproom and create some party favors. I'm actually VERY close to completing work on my scraproom. Might need about another month or two and then I will show it all off in a video. Still working on the party favors but here are pics of some favorite scrapbook pithy expressions. It really changed the look of the room. Some of you might recognize the bird next to the frame; after adding these expressions I now want to find two wall storage solutions to put on either side of the bird and from.

Some of these expressions are from Everyday Cricut, others are found in scrapper's tag lines on the yahoo groups. See if you recognize yours: