pink

Saturday, March 31, 2012

Smash Book part 17

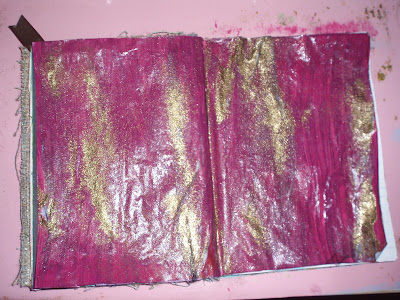
I'm loving this first page! Acrylic paint with gold embossing powder:


I took an embossing folder and rubbed black soot distress ink using my ink applicator. Then spray gently with a red hue of glimmer mist:


With this one, I went for the plaid look with my distress stains: 


Distress Stains, crackled paint, and distress ink:

Come back tomorrow for more! :-)

Freda

.

Friday, March 30, 2012

Smash Book part 16

Are you ready for some more? This one I used my choice of Distress stains and sprayed a little with Glimmer Mist while the Distress Stains was still wet so it would all blend in a little. Then I tore strips of paper and laid one over the other to use as a mask. Next, spray with a darker color in Glimmer Mist. Dry. Stamp (with the paper still on as a mask) with a script stamp of your choice. Finally, give it a good coat of Glim Glam:


I have these Fleur de Lis stamps in my collection so I decided to do something French. The colors are from Distress Stains and acrylic paint. Unfortunately the White Picket Fence Distress Stains did not coat the paper well enough for the look I wanted. So I used acrylic paint instead for the white:


Ah! This one, believe or not, was inspired by a table top at a local Mexican Restaurant. Done entirely with acrylic paint and stamps. Basically the process was paint, dry, stamp, dry, stamp. This photo looks better in close up and even better in person:


I also have a ton of flower stamps. Distress Stains was my background:


Tomorrow I have a couple of surprises for you!

Freda

.

Thursday, March 29, 2012

Smash Book part 15

Today I played around with my embossing powder a little bit. The photos don't really do the pages any justice;  you really need to see them in person and feel. The first one is with acrylic pain, inked stamp, and using a stencil on the edge with embossing powder:


Remember the bubble wrap? This time I used it with embossing glue and sprinkled with black embossing powder: 

Glimmer Mist and gesso. This was meant to be the "negative" version of a page from yesterday, but it did not come out as well as I hoped. I'm going to try something similar soon, but with dictionary paper. So don't think you're seeing double :-):

Hmm...this one did not come out as well as hoped either. Sigh! :-(: 

Ok, since I had two bummers in a row, I decided to include a bonus page. This one is Distress Stains, my Tim Holtz Stamper's Anonymous stamps, and Distress Ink. I kept the stamps on the card in their original position since the card is almost the same size as the paper I was working with. Remember, Distress Ink is reactive. So I decided to make this page interesting by using my mini-misters to spray water on it. See how the ink bleeds through the paper? It also created some water spots where the Distress Stains are. Dried with heat gun (carefully! The other side has embossing powder, lol) and inked around edges with some more Black Soot (Distress Ink): 

Come back tomorrow for more! They just keep getting better :-).

Freda

.

Wednesday, March 28, 2012

Smash Book part 14

Ooh! do I have some goodies for you today! The first page in today's series I took some more dictionary pages  I used one of my favorite stamps inked with emboss glue. I used white embossing powder, and heat gun: This created my resist. Then I sprayed with Glimmer Mist:


Glimmer Mist and Gesso:

Glimmer Mist and Gesso:

Acrylic Paint, favorite script stamp and inked edges with Distress Ink: 


And you get a bonus page today because I messed up with picture taking. This page belongs between 1 and 2 in today's series. On the page below, I used several Distress Stains to create a plaid look:

Come back tomorrow for more! Thanks for looking!

Freda

.

Tuesday, March 27, 2012

Smash Book part 13

I love these pages! :-) This one I started with Glimmer Mist, then took a piece of lace fabric, and rubbed Distress Ink in there:


Comic page of the newspaper, with Distress Stains to age the paper itself, then inked the edges with Distress Ink:

Distress Stains, then stamped with Distress Ink and used my mini mister to spray water. Remember, Distress Ink is reactive; so the ink bled into the paper. Then I inked the edges with the same color in Distress Ink:


Distress Stains with a glue (Mod Podge) resist: I also stained the newspaper clippings with a very light yellow color of Glimmer Mist:

Come back tomorrow for more! Even better looking pages!

Freda

Monday, March 26, 2012

Smash Book part 12

And we're back!

Sorry folks, but sometimes real life takes over. But I promise, it was worth the wait! Below are the next 4 pages in this series. The first photo is basically ripped and distressed paper:


Masking tape and Distress Ink:


Distress stains, Glimmer Mist, and Distress Ink: 


Distress Stains, a stencil, and Distress Ink:


Please check back tomorrow for some more! Thanks for looking!

Freda

.

Friday, March 16, 2012

Another sorry!

Sorry all! but life has been happening here at home so I probably won't have anything for you until some time this weekend.

Today I had to deal with Animal Control. See, last summer our house had a rat problem. Yuck. But if you live in Houston, you have rats. Even in the city proper. They come in from out of the heat. Last summer was pretty bad because of the drought. They even chewed our A/C line which shorted out something and took out the A/C to upstairs where my scrappin' magic happens.

It was so bad that our next door neighbors were also having a problem. Ah! such as life living on the Golf Course; yeah, we look out into the backyard and there's the Golf Course. You see every type of rodent trying to get into the yard. Skunks and possums dig under the fence; racoons climb over the fence and trees.There are some mornings I wake, get the paper, and can tell there was a skunk in our car port during the night. Or, from what I learned when Animal Control came out here to trap a family of possums living under our deck, skunks dig these tiny holes in the mulch looking for these teeny tiny worms to feed on. That, and they love citrus and other fruit. Great. We have a lime tree and a pear tree in the yard. And we can forget having a foot garden in the backyard. Guess I'll get some space at the co-op place at the local Interfaith church.

 Anyway, the dog will occasionally go out to investigate when she smells rodent. And yes, the dog has been sprayed a few times by a skunk. She even had to spend the night outside one time because she really got up close and personal with one and we weren't about to give her a tomato juice bath at 11PM. By the way, tomato juice doesn't work, at least not on dogs (don't know about humans); we will only use it to help take the edge off so we can tolerate the smell long enough to get the dog to the groomer.

She also had a close encounter with a raccoon which really scared me. I didn't want the raccoon to rip up the dog; they have sharp claws. But I think the dog scared the raccoon because that thing hightailed it to the nearest tree and jumped into the neighbors yard...who also have a dog.

Then there are the squirrels. The dog LOVES squirrels. I even found a squirrel toy for her at Wal-mart. She loves to chase after it when I throw it down the foyer hallway. She picks it up, walks briskly away with it, chews on it, whips it back and forth with it in her mouth...I wonder what she would do if she ever caught a real one? There are times I think the squirrels are playing with the dog in the backyard as they jump tree to tree and the dog tries to run and jump up at one.

So we trimmed our trees and made sure nothing was within 4 feet of the house, called Animal Control, and got rid of the rats. Everything was fine throughout winter. In summer of 2010 we had bees (FYI) in the attic - a lot of them! Now it's Spring. No, the rats aren't back; but we very badly wanted to rodent proof our house before they could have a chance to come back. Apparently, that is a reality because March is the time of year that rodents are having their babies so they're looking for a place to nest.

I feel better now knowing the house is rodent proof. It's a 3 year warranty. So if we get a rodent up in the attic (can't control the yard), Animal Control will come out and take care of the problem, meaning they will trap the rodent, fine its point of entry, and seal that up. It was expensive, but I have some peace of mind.

Actually, I take that back about controlling the backyard. It's not 100% fool proof because some rodents can climb a tree, but we can control the diggers. Buy a bag of lime and some sand at Home Depot. You make a mixture of the two, dig a small trench along your fence and pour. Now take a watering can and use that to water the mixture. Wait for it to dry. It will be like cement. That is what we did for the deck. We covered it up with dirt afterwards.

But along the fence we have landscape timbers. So before it gets really hot outside we need to do the same along the fence and put the landscape timbers back in place after the lime-sand mixture dries. The digging rodents don't like the feel and if you do it well enough, they will get discourage and leave. It's mainly skunks who dig. Possums are lazy and won't make much effort; they're more like opportunists and will climb through a hole if it's already there. So if we get rid of the skunks we can get rid of the possums.

Freda

.

Wednesday, March 14, 2012

Smash Book part 11

Oh do I have a discovery to share with you! While heat drying my Gesso on the first page, it started to bubble up. I *LOVED* the result and the texture! just get the heat tool up there close without touching and it will bubble for you. It might even pull up on the paper and start to force the paper to crinkle up. That's ok! If it's too sticky after it's dry then spray with a matte finish.

I sprayed with a brown and a red in Glimmer Mist and then went over my page with Gesso before the GM could dry. Then I took the heat tool to my page:


I thought since the other page worked out so well I would try something similar but with Distress Stains. I covered my paper with Distress Stains (Walnut) in sections and went over each section with Gesso before the Distress Stains could dry. Then I did the next section and repeated what I previously did. While the Gesso was still wet I managed to get a few pieces of scrap ribbon in place; however, I ended up gluing the rest of the scrap pieces: 

This one I tried an old Tim Holtz trick. First I covered my paper with Distress Stains, then I took some red tape and put "stripes" on my paper. Sprinkle some embossing powder, heat, and voila!:


Ok, by this time I had to go tame because I was afraid between the Gesso and embossing powder, if I did anymore heating before my matte finish spray arrives that my previous 3 or 4 pages would start sticking together! so I took 3 bright Glimmer Mist colors and sprayed! Then I went around the edges with a brown:


While doing the above page I realized there was some dried Gesso on the paper which reminded me of something. Come back tomorrow to see what it reminded me of...

Freda

.

Tuesday, March 13, 2012

Smash Book part 10

Sorry about not having anything for you yesterday. I thought I had it set up but I was wrong. Below are the next 4 pages. The first one is Glimmer Mist, Glim Glam, Gesso and Acrylic Paint:


This one did not turn out as well as I hoped. I think it may be one of those things where it looks better on card stock. I took a piece of lace, sprayed over it with Glimmer Mist, removed the lace, placed a paper towel over the paper, and used my brayer to soak up the excess. Then I carefully sprayed around the edges with Chocolate Covered Cherries Glimmer Mist but during the process I decided I liked the splattered look:


This is fire brick Distress Stains with Chocolate Covered Cherries Glimmer Mist: 


On this one I used Gesso and acrylic paint blended together and sprayed around the edges (and lightly in the center) with Chocolate Covered Cherries Glimmer Mist. It's rather sticky, even after drying so I'm waiting for some fixatif and matte spray to come in and hope that will solve the problem:


That's it for today. I have a wonder selection and discovery for you tomorrow!

Freda

.

Sunday, March 11, 2012

Smash Book part 9

Welcome to part 9! This began with a composition notebook I thought it would be festive to use a composition notebook cover stamp. The background is  Distress Stains:


Co'ordinations paper and cardstock: 


This is so far my most favorite! I used acrylic paint on the background, then adhered black tulle to the paper. While waiting for the glue to dry, and getting practically nowhere with the heat tool, I decided to add another element: embossing powder! Plus, the heat tool melted the tulle a little in some spots. Doesn't it look awesome?:
 

Saturday, March 10, 2012

Smash Book part 8

Ooh! you're going to love, love, LOVE this! Below is a page from an unwanted legal magazine that was heading to the recycling bin. Fortunately I found a few phrases that seemed sentimental:


Remember the page with acrylic paint, bubble wrap and distress ink? This one is completely acrylic paint:


 Here is the bubble wrap itself. I can wash it off and reuse it for another mixed media project:


Acrylic paint and grosgrain ribbon. Yes, I ran out of ribbon (it was re-purposed from a packaging) and yes, I purposely left the end sticking out for a tab and page marker: 


This one is a favorite. Distress Stains and embossing powder. I used my stencil and pressed it in the adhesive. Then sprinkled embossing powder over it and brushed off. It looks like gold foil:


Come back tomorrow for more!

Freda

.

Friday, March 9, 2012

Smash Book part 7

I had fun with today's pages. First up is a page with Glimmer Mist and Pearl Mist:


Glimmer Mist and Glim Glam: 


Distress Stains and Glim Glam: 


Distress Stains and Smooches: 


Be sure to check back tomorrow! I have some interesting pages to share! :-)

Freda

.

Thursday, March 8, 2012

Smash Book part 6

Sorry for the delay! I've been sick with a cold all week!

The first pic I attempted the ol' lemon juice trick many of us did as kids. To heat, simply use your heat tool. Yes, I know lemon juice is acidic and we try to go with acid free techniques. But I will spray with Krylons "Make It Acid Free" and hope for the best! The left side came out, but the right side not, really. Still, I love the effect:


Torn pages of an old dictionary and inked with Walnut Stain distress ink:


Burlap from Canvas Corp. It comes in two 12x12 pieces sewn together. I separated the two pieces and cut the one so it would fit on my page. There was a little bit of space so I put some more dictionary page pieces in there. I didn't know what I was going to do with the burlap when I began so the dictionary page pieces provided some inspiration. Next, I got out a used piece of my Tim Holtz letters and used it as a mask and sprayed with Glimmer Mist:

Next is canvas, by Canvas Corp. It comes the same way as the burlap discussed above. Only this time I used a scrap piece of DCVW paper with white core I had in my personal stash. It was already punched, Fiskars Leave it to Weaver, which made it all the more ready for me. It was screaming "please use me"! Originally I tore it, but when I saw the white core, I thought 'nah'. Now I wish I kept it that way.

I used a Martha Stewart punch to create a mask for the right side and sprayed with Glimmer Mist using a piece of paper to cover the left side so it too did not get sprayed. That's why I wish I went with my first impression: to tear the paper with the white core because the white core would have gotten colored by the spray. No worries! I can still do that on another page.

Anyway, before the ink could dry I laid a paper towel over it and used my brayer to soak up the excess ink for a soft look. The paper towel bunched up on me which created a look I'll have to try on another page; an unintended consequence, lol. Hmm, maybe I'll go back with my Un-du and try that paper part again (tearing the paper):

thanks for looking! Check back tomorrow!

Freda

.